August 2, 2013

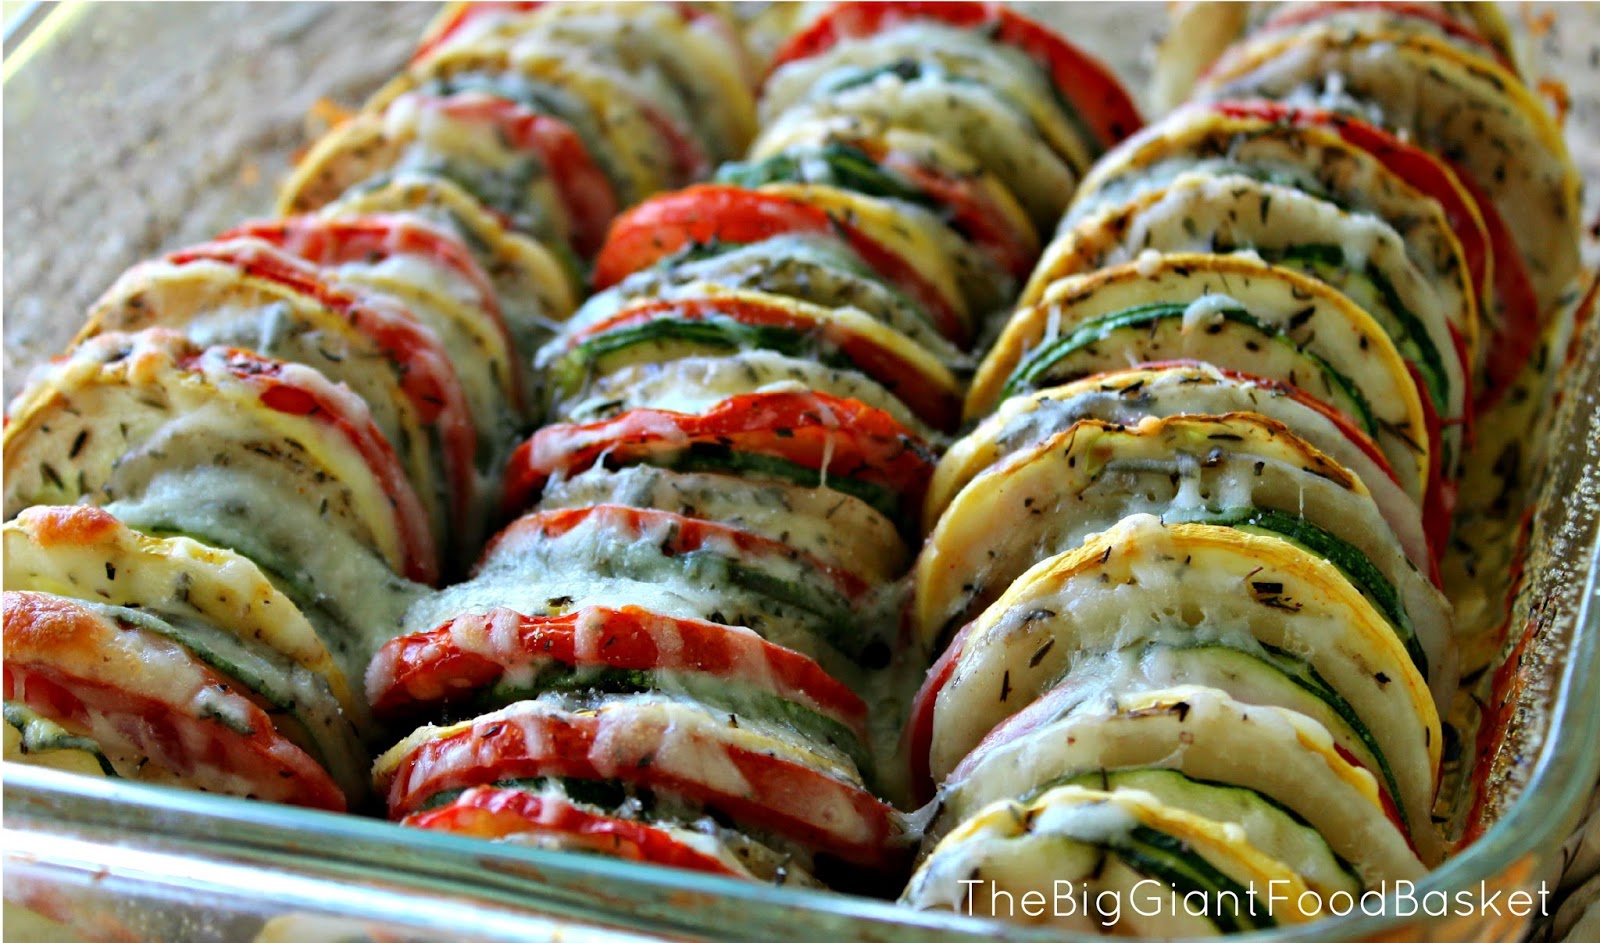
Super Easy Summer Vegetable Casserole


Now that all of those yummy summer vegetables are becoming plentiful, I am always on the look out for new ways to prepare them. The other day I saw this recipe floating around on Facebook and was so impressed with the pretty colors, the fact that the slices veggies are vertical, and aside from the cheese (I used extra cheese), it really is a pretty healthy dish! So yes...I had to make this casserole!


Ingredients:

Extra Virgin Olive Oil for sautéing
1 medium onion, chopped
2 large cloves of garlic, chopped

Now try to keep the slice thickness the same for all of the sliced veggies. I used by brand new food processor for the zucchinis and potatoes.

2 zucchinis, sliced
2 potatoes, sliced
2 summer squashes, sliced
3 plum tomatoes, sliced
salt and pepper
dried thyme
fresh rosemary, chopped
1 cup shredded Italian cheeses
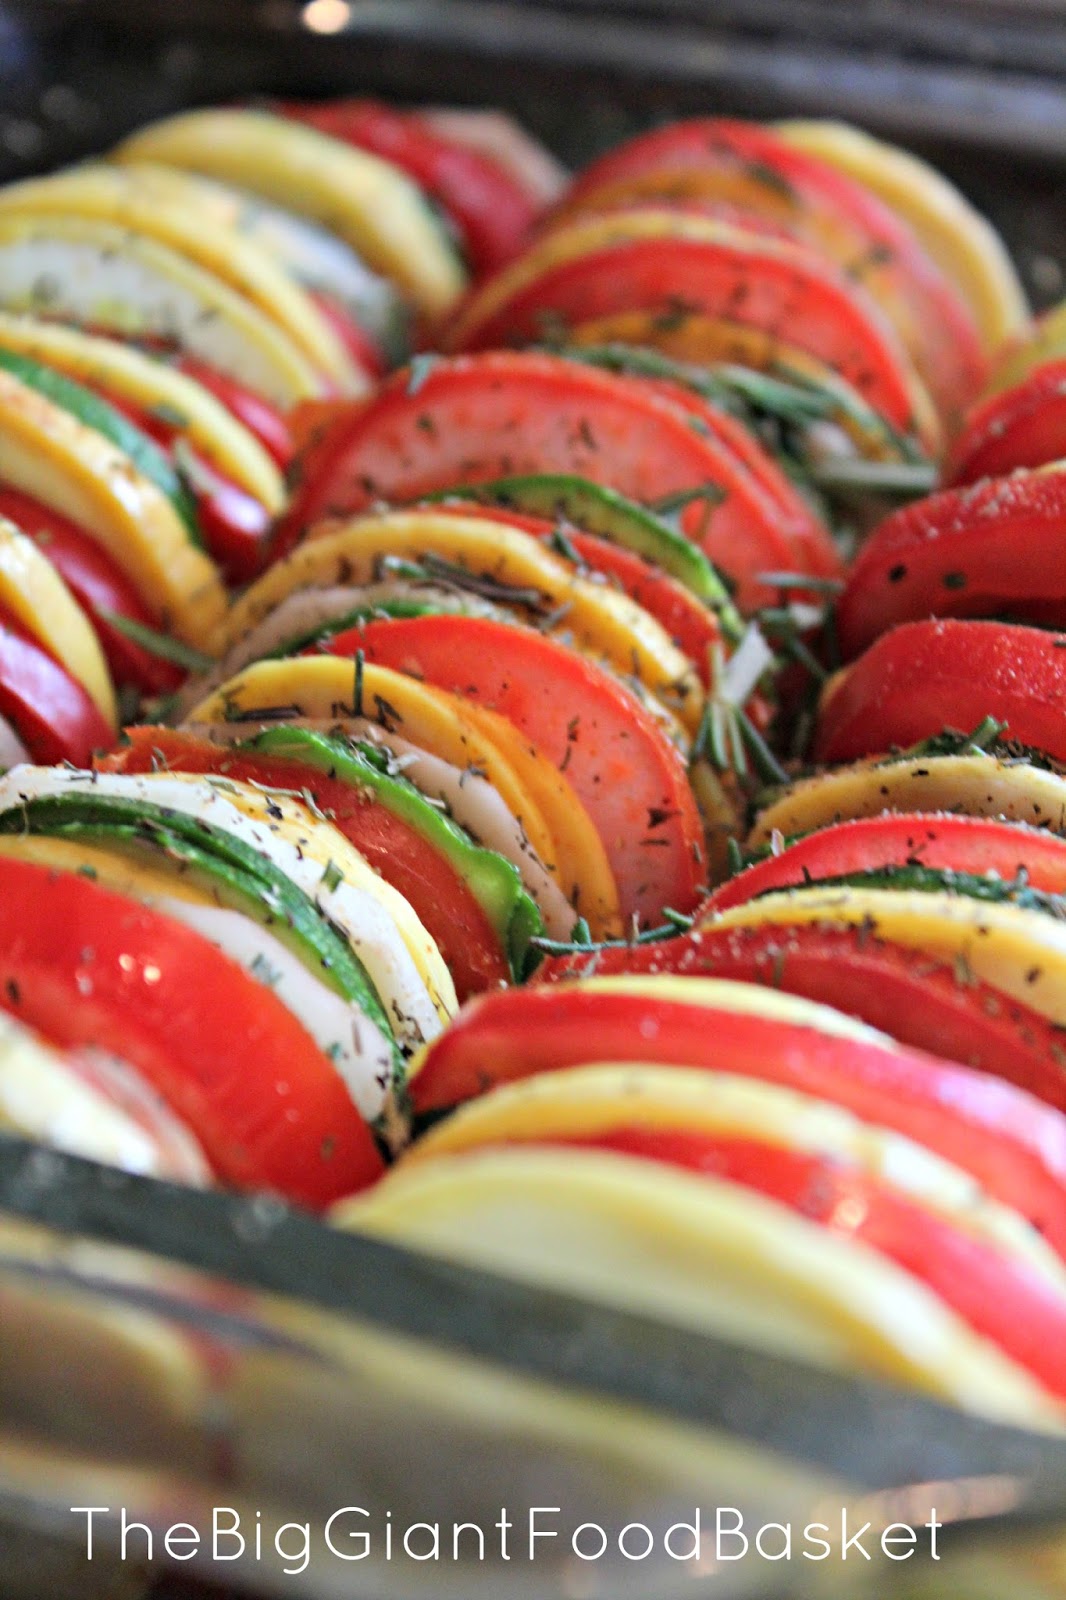


Sauté the garlic and onions in the olive oil until soft, about 5 minutes. Spray an 8 x 8 inch baking dish with cooking spray. Spread the garlic and onion mixture on the bottom of the pan and then begin to stack your veggie slices vertically. I stacked my zucchini, then potato, summer squash and tomato. It kind of rhymes so it's easy to remember. Yay that and the fact there are only 4 vegetables!!!

Season generously with salt, pepper, rosemary and thyme. Cover dish with aluminum foil and bake in an oven set at 400 degrees for 30 minutes. Uncover and sprinkle on the cheese and then return to the oven for another 15 to 20 minutes until the cheese is a golden brown.

Serve hot and enjoy those vegetables!!!

 XO
Sharing this recipe over at these wonderful blog parties...
BeColorful

SUPER EASY SUMMER VEGETABLE CASSEROLE

July 30, 2013

Buttermilk and Oatmeal Bread with a Honey Butter Spread


Last week while we were on vacation visiting the Canadian side of Niagara Falls, Chris and I took the kids out for dinner at this wonderful steak house over at the Fallsview casino mall called the Canyon Creek Chop House


The first thing we were served was a delicious bread with this ah-mazing honey butter spread! At that point I knew I would be on a mission to recreate that butter.


As it turns out, the butter was pretty easy to make. It is a 2:1 ratio of butter to honey, just let the butter sit at room temperature until it becomes soft, do not melt it in the microwave. Once soft add the honey a whip the butter and honey together. You can store it in the refrigerator as you would any butter, but make sure you remove it from the frig about 15 minutes before spreading it so it has the chance to soften naturally.

Now for the bread...I actually went on line looking for a nice healthy bread recipe and came across this buttermilk and oatmeal bread at a blog call Courage in the Kitchen. This recipe is very simple and the bread is incredibly soft and moist.


Ingredients:

2 cups of warm water
1/4 tsp white sugar
2 1/4 tsp. active dry yeast
1 cup buttermilk
1/4 old fashion oatmeal (must be old fashion oatmeal, no quick cooking or instant oats)
1/4 brown sugar
1 T salt
2 T butter
4-5 cups of all-purpose or bread flour (I used bread flour because I happen to have it on hand

First put 1/2 cup of water in a small bowl and then stir in the 1/4 tsp. of white sugar along with the dry yeast. Make sure the water is roughly body temperature...if it is too hot it will kill the yeast. Let mixture stand to proof the yeast. (Proofing the yeast = until the yeast becomes active)

Bring the rest of the water 1 1/2 cups to a boil and add the oatmeal, let cook for about 3 minutes or until it begins to thicken. Pour the oatmeal into a large bowl and stir in the butter, salt, brown sugar and buttermilk. Mix until smooth. This should cool the oatmeal enough for you to handle. Begin to add the flour and keep adding it until the flour until the dough begins to pull away from the sides of the bowl.

Turn the dough out onto a generously floured surface and knead the dough for 10 minutes. It will be sticky at first but as you knead it it will become pliable and elastic. Add more flour as to your working surface as necessary. Place dough in a  bowl which has been greased with butter, shortening of cooking spray. Roll the dough until it is coated with the grease. Cover with damp towel and place in a warm spot to allow it to rise to 2 times its original size. This may take anywhere from 45-50 minutes.

Grease two 9 X 4 1/2 in loaf pans. Once the dough doubles in size, punch it down and knead for one more minute. Split the dough in half and place each half into a prepared pan. Again cover the two pans of dough and let them rise until the dough is even with the top of the bread pans. Place the pans in the center rack of an oven preheated to 375 degrees and let bake for about 30-35 minutes. The original recipe says to let it bake for 40-45 minutes, so just keep an eye on it as oven temperatures do vary.

 Remove from oven and let cool slightly. I like my bread on the softer side so I wrapped each loaf with plastic wrap and aluminium foil while they were still warm.


Enjoy!!!

XO
Sharing this post at link parties over at these wonderful blogs...


BUTTERMILK OATMEAL BREAD WITH A HONEY BUTTER SPREAD

July 19, 2013

Adorable Minion Cupcakes


What better way to celebrate the return of the Twinkie and Disney's new movie Despicable Me 2 than with Minion cupcakes!

The other day a good friend posted this on my Facebook page which was a share from a page called Recipes Galore. They were so cute that I had to make them tonight for the kids as they watched the first Despicable Me flick.

Note: If you cannot find Twinkies per say, here in the northeast we have the Tastycake version called Dreamies.


Wishing you all a great weekend!!!
XO

Sharing over at these super blog parties...


ADORABLE MINION CUPCAKES

July 15, 2013

Baked Pork Chops with a Savory Blueberry Sauce


OK I was a bit skeptical myself, but this sauce is so savory despite the 4 tablespoons of brown sugar that it takes on a life of it's own!!! I used a combination of some fresh and dried herbs. The pork chops are given a quick browning in the pan and then finishes cooking in the oven


Ingredients:

4 boneless pork chops
1 tsp. garlic powder
1/2 tsp. fresh cracked pepper
a dash of cayenne pepper
flour for dredging

1 cup fresh blueberries
4 T brown sugar
1 tsp. fresh parsley, minced
1 tsp. fresh sage, minced
1/2 tsp. dried thyme
1 tsp. Balsamic vinegar

Season the chops with the garlic powder, pepper and cayenne pepper and then dredged the chops in the flour. Set aside. Heat olive oil in an oven safe pan, (I used olive oil infused with garlic and rosemary but plain is fine too) and add the chops, cooking about 4 minutes on each side until they turn brown. Place the entire pan in the oven heated to 350 degrees F. Cook for roughly 10 minutes or until the inner temperature of the chops reached 170 degrees F. 


In the meantime mix together the next six ingredients. Once the pan is removed from the oven move the chops to a plate and cover them with tin foil. Add the blueberry mixture to the hot pan and heat on the stove top. Cook until he blueberries begin to break down. Take any juice that has drained from the pork chops on the plate and pour into the blueberry mixture. Cook for about 3 more minutes. Remove from the heat and serve immediately with your chops!!!


 Enjoy!!!
XO


BAKED PORK CHOPS WITH A SAVORY BLUEBERRY SAUCE

July 10, 2013

Delicious Blueberry and Lemon Cheesecake Squares


You know those little paperback recipe books you always see at the checkout line of the supermarket? Well I am a sucker for them, especially if I have to wait any time for my order to be rung through.

So yesterday I hit the food store after dropping Michael off at summer rec and yes...I just had to pick one of those little books up...it had been awhile since I broke down and bought one anyway. The book I grabbed for a mere $4.99 was Betty Crocker's ...cobbler pies & more. Oooh and did I have fun flipping though those pages. The first recipe I decided to make was this fabulous looking Blueberry Lemon Cheesecake Squares. The recipe was actually from a blog called Inspired Taste.


This is a very simple recipe to execute and the taste of these little treats is fantastic.

Ingredients:

For the Crust
9 graham cracker rectangles
2 T sugar
2 T lemon peel
1/4 butter melted

For the Filling
2 8 oz packages of cream cheese, softened
1/2 cup sugar
2 eggs
2 T lemon peel
juice from one lemon
1 1/2 cup fresh blueberries

For the Topping
1 cup packed brown sugar
3/4 cup all-purpose flour
6 T unsalted butter, cold


Heat oven to 325 degrees F and spray an 8 or 9 inch square baking with cooking spray.

In blender or food processor pulse together the cracker, sugar and lemon peel  until crumbs form. Add the melted butter and blend until it is mixed in well. Press this mixture into the bottom of your pan and bake in the oven for 10 minutes, then let cool for about 10 more minutes.

Clean out your blender or food processor and add the cream cheese, 1/2 cup sugar, the eggs, 2 tablespoon of the lemon juice and the lemon peel.  Blend until the filling is nice and smooth then pour over the cooled crust and top with the blueberries.

Finally, in a medium bowl, mix together the brown sugar and flour then cut the cold butter into the two ingredients until the entire mixture resembles crumbs. Sprinkle the crumb mixture over top the filling and bake in the oven set at 325 degrees F for about 40 minutes. (The center should slightly jiggle when done baking.) Remove from oven and let cool for on cooling rack for about an hour and then chill in the refrigerator. Cut 3 rows by 3 rows to yield 9 squares. Store covered in the frig.


Enjoy!!!
XO

Sharing at these blog link parties...


BLUEBERRY AND LEMON CHEESECAKE SQUARES

July 6, 2013

Simple Summer Drink


This is so super easy and the kids will love it! All you need is the 1:1 ratio of white grape juice and 7-Up. I used diet 7-Up to cut the calories. Then fill it with frozen fruit and pour.


You could also use frozen grapes and orange slices
I added a few star shaped ice cubes as well.

Enjoy!
XO

June 30, 2013

Easy Weeknight Dinner ~ Parsley Pesto Tossed with Pasta


I am a huge fan of pesto...all kinds. And last month's issue of Bon Appeitit had this wonderful looking parsley pesto with pasta right on its front cover...ooooohhhh now how could I resist giving this recipe a whirl?

So easy too...all you need is...

1/2 cup of unsalted roasted almonds
4 cups of flat leafed (Italian) parsley
3/4 cup fresh chives
3/4 extra virgin olive oil (EVOO)
1/2 grated Parmesan, (I like Locatelli)
freshly ground black pepper
1 lb of spaghetti or any one of your favorite pastas

Cook the pasta in a large pot of boiling salted water and stir occasionally to keep it from sticking to the bottom of the pot. In blender or food processor, pulse the almonds until fairly smooth. Add the parsley, chives, EVOO and Parmesan and again pulse until smooth. Season with salt and pepper. (I used sea salt)


Toss pesto with cooked pasta and again season with salt and pepper.


Enjoy!

Ciao 4 now!!!

Sharing this post at these super blog parties...

June 28, 2013

All-American Cherry Pie


We are headed to the shore this weekend and will be down there through the fourth of July! Last year we spent the 4th riding our bikes around historic Cape May New Jersey and then the evening listening to the Cape's ragtime band play an bunch of the early 1900's tunes in the town's gazebo. 


So to help celebrate our nation's birthday I started today by making this homemade cherry pie.


Wishing you all a very happy and safe 4th of July!


XO

Sharing this post over at these swell blog parties...

June 24, 2013

Strawberry Banana Jam Corn Biscuit


While I was sitting in the dentist office today waiting for Michael to finish up with his appointment, I was flipping through  one of their magazines, this month's issue of Bon Appetit. and came across a recipe they had for strawberry jam biscuits. The jam is baked right into the biscuits it is suggested to pair them with vanilla ice cream! How Yummy!!! I actually had just put up several jars of strawberry banana jam last week to give away to bus drivers and teachers as end of the school year gifts, so I thought why not try out this recipe with my homemade jam! I asked the receptionist at the office if she could copy the recipe for me but she told me to just go ahead and take the entire magazine!

Then on the drive home I had another idea, I love corn bread so I decided to make the biscuit a corn biscuit instead of a plain biscuit! And of course I did pair them with good old vanilla ice cream!

To make the jam click here...this will take you to the link for my jam recipe over at my other blog 21 Rosemary Lane. Or you could just omit the banana and use jarred jam from the supermarket. (But it is better with the banana)


For the biscuits...

  • 1 1/2 cups all-purpose flour, plus more for rolling out dough
  • 1/2 cup yellow cornmeal
  • 2 teaspoons baking powder
  • 3/4 teaspoon baking soda
  • 3/4 teaspoon salt
  • 1/4 cup sugar
  • 6 tablespoons unsalted butter, chilled and cut into 1/2-inch pieces, plus more for topping, if desired
  • 3/4 cup plus 1 tablespoon buttermilk


    Mix all the dry ingredients together first and then cut the butter into the dry mixture with a pastry blender until the butter disappears. Add the buttermilk and mix well with your hands.

    On a piece of parchment paper, roll out your dough until it is 1/2 inch in thickness. Cut dough with cookie cutter or the rim of a glass. Place each biscuit on a jelly roll sheet lined with more parchment paper. Make a small divit with a spoon or your thumb and spoon 1.2 tsp or a bit more into the divit. Bake in an oven preheated to 400 degree F. and bake for 15-18 minutes.

    Serve warm with vanilla ice cream and enjoy!
    This recipe yielded 10 muffins.


    XO

    Sharing this post over at these blog link parties...

Trip Advisor